
In this post I’ll look in detail at the threading draft, how it relates to the threading on the loom and some of the additional information that can be incorporated within it.
Many formats, one threading
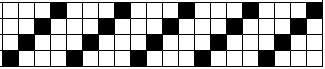
The threading draft is the instruction that tells you how you need to thread your warp for a specific pattern. It is written horizontally, and is usually presented either on a grid or on something that looks a bit like a stave in music. Although the symbols vary, all of the following show the same threading, the one we call the straight draw on four shafts.
 Draft created using weaving software
 Draft written by hand on squared paper
 Draft written by hand on ruled lines
 Draft recorded in an Excel spreadsheet
The threading is usually read from right to left.
The loom connection
How does this information relate to your loom? Imagine hovering over a warped-up loom and looking down at the shafts (with handy x-ray vision that can penetrate the top of the castle). Here’s a simple diagram of what that might look like:

Now imagine placing a piece of paper over the top and marking an X where every warp end was threaded through its heddle. You would – if you were unbelievably neat – get something like this…

…and you would have recorded a threading draft. In other words, every row in the draft represents one shaft and every column represents one warp end: the X (or vertical line, or black square, or other symbol) indicates which shaft each warp end should be threaded on. By counting the rows in a threading draft you can immediately tell how many shafts are used to weave that design and determine whether or not it is suitable for your loom.
Is that it?
Here comes one of my most over-used answers: Yes and No!
Yes, the principle really is that simple; no, we don’t have to stop there.
Note that the basic threading draft doesn’t tell you everything you need to know about your warp. It doesn’t tell you what colours or yarns to use, or what sett you will need, for instance. Although it can be unnerving at first, this is actually one of the great strengths of weaving drafts: they are independent of any specific project so you are free to make your own design choices. However, when projects are published in books and magazines, some additional information like this may be incorporated. Colour is easy to introduce by varying the symbols on the draft and/or including a key:

In weaving software the colour is often recorded on a separate line above the threading.

In this spreadsheet example, a red letter R now stands for the colour red.
Sleying information may also be included, if it is important to the weave structure. What do I mean by that? Well, when you are weaving a twill, you would usually sley your reed in whatever way suited the weight of your yarn and the reed you happen to have. The fact that you may put two ends per dent in a 12-dent reed, while your friend with exactly the same yarn may put three ends per dent in an 8-dent reed, is not critical to the structure of the cloth. You’ll both get a nice twill. However, when you are weaving certain kinds of fabrics, such as laces, the way you group threads in the reed may have a critical impact on the way the cloth turns out. Again, the presentation may vary, but typically you will see some kind of bracket grouping the ends together. Here’s an example:

Because threading drafts may be very long, weavers also use techniques for abbreviating them. This draft tells the weaver to thread the first sequence five times, then a different sequence twice, and then to repeat the first sequence five more times.

Finally, it is worth noting something else about the connection between the loom and the draft, though I will say more about this in a later post. For most of us, the convention is that shaft 1 is the shaft nearest to us when we are weaving. If you thread your loom from back to front, then it is also the shaft nearest to you when you are threading. If you read the bottom row of the draft as shaft 1, then it is easy to transfer the draft to the loom as you work. Following this convention – and remembering that we start reading from the right – we can read the draft above out loud like this: “Thread 4-3-2-1 five times, then thread 2-3-4-1 twice, then thread 4-3-2-1 another five times.”
Culture and convention
I’ve mentioned convention a couple of times already in connection with the way weaving drafts are presented. Different weaving cultures have developed different conventions in the way weaving information is recorded and interpreted, and this is something I will continue to unpack as we go. However, the main thing to remember is that there is no single ‘right way’, so relax and enjoy the variety!
First posted on weavingspace.co.uk © Cally Booker


