I want to return to the subject of double weave blocks to introduce one of my favourite options. We have already covered the exchange of warp layers on both 4 shafts and 8 shafts. Now ask yourself: what if we keep the same warp layer on top, but just exchange wefts? Is that even possible? Why yes, it is. Using the block threading described here, we can take advantage of the same principles in a slightly different configuration of lifts.

A reminder of the threading

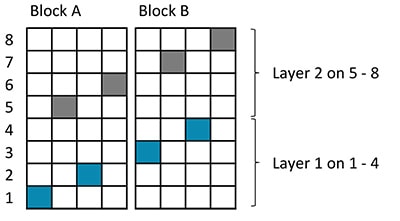
Our threading is organised so that layer 1 is threaded on shafts 1-4. The layer 1 warp ends alternate on shafts 1 & 2 in block A and on shafts 3 & 4 in block B. Let’s consider how we can keep the layer 1 warp on the face of our cloth but with a different weft showing in each block.
Do you want to understand double weave?
My online workshop has helped hundreds of weavers to master block double weave on an 8-shaft loom.
Thinking it through
So far in this discussion of 8 shaft double weave we have always woven the same weft all the way across each layer. In the case of layer 1 that means lifting shafts 1 & 3 and then shafts 2 & 4. But shaft 1 and shaft 3 belong to separate blocks, so they can act independently of each other. Let’s mix-and-match. What would happen if we lifted shafts 1 & 7 and then shafts 2 & 8?
Imagine we are looking at the ends of the warps threaded according to the plan above. Magically, they have their shaft numbers running all the way through, like the writing in a stick of rock…

If I raise the ends on shafts 1 & 7, I can imagine a weft passing through the shed like this:

If we continued by raising shafts 2 & 8 for the next pick, we would still get a valid plain weave, but our weft yarn would be travelling through a striped warp layer. In areas threaded as block A, the stripe would be the colour of layer 1. In areas threaded as block B, the stripe would be the colour of layer 2.
Wait a minute, though… We weren’t planning on seeing layer 2 on the face of the cloth. That tells us that we want to ‘hide’ layer 2 in block B, by raising both the layer 1 shafts, i.e. shafts 3 & 4.


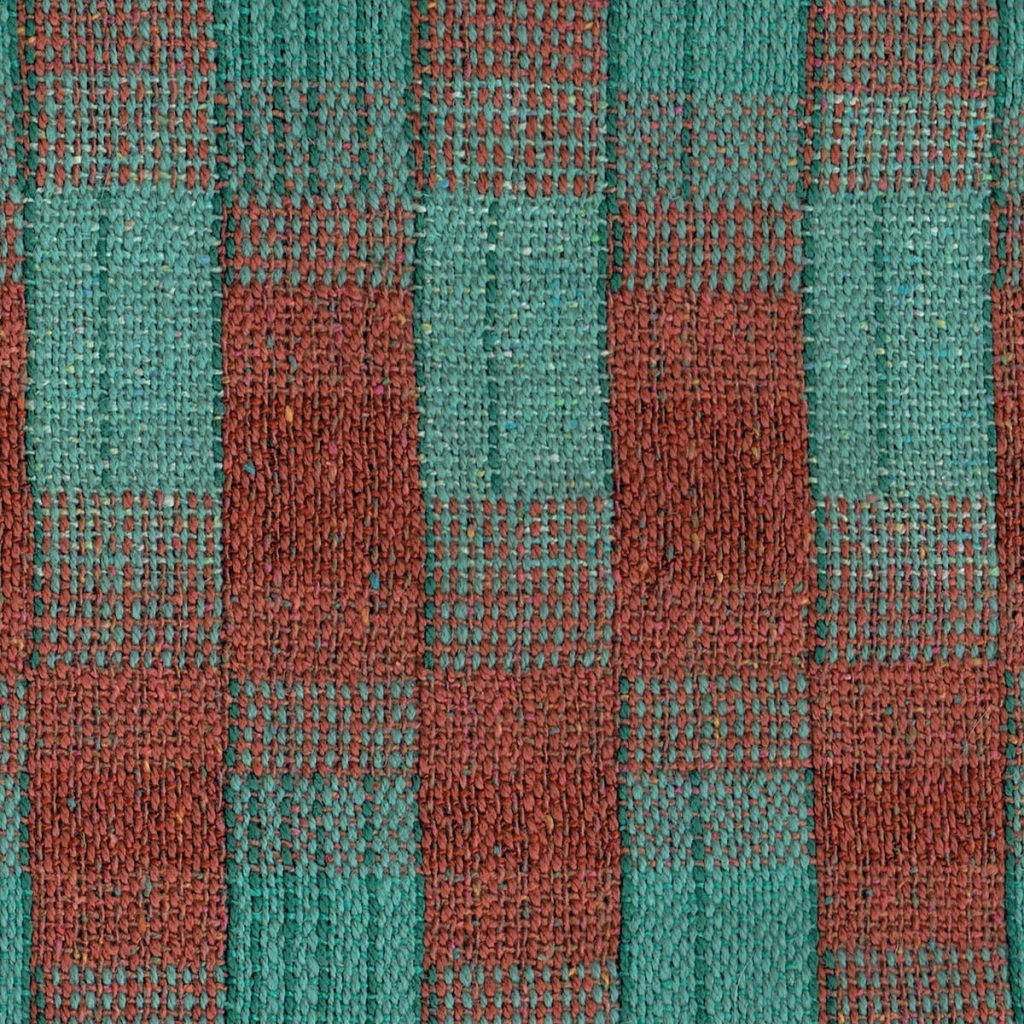
With this combination of lifts, the green weft I have used in my example will be seen mixing with layer 1 on the face of the cloth in block A and with layer 2 on the back of the cloth in block B.
Liftplans for weft interchange
So far, of course, we only have one weft in play, and half our warp ends haven’t been woven. As with all our other double weave liftplans, we need a sequence of four picks to achieve a complete cycle of plain weave in both layers.
In these liftplans I have deliberately used two colours which are not in the threading draft, as a reminder that we are not creating solid colour layers/blocks.
For layer 1 on top (dark green shows in block A, light green in block B):

For layer 2 on top (dark green shows in block B, light green in block A):


Scope to experiment
In both of the liftplans shared above, the same shafts are used to make plain weave. The only difference lies in which shafts are raised out of the way to hide or reveal a layer. I am hoping that this makes you wonder what other combinations are possible! Does shaft 1 always have to be paired with shaft 2, for instance? Guess what. No, it doesn’t. There is a huge amount of scope for experimentation with double weave blocks and I hope you feel encouraged to explore.
First posted on weavingspace.co.uk © Cally Booker


Oh my, weft interchange take a lot of thinking! But what a great idea. N0w to apply it to 16 shafts!
It does exercise the brain, doesn’t it? This is a great thing to play with on a table loom because you can test your thoughts by lifting levers and peering into the shed! I’ll look forward to seeing what you can achieve on 16.
I’ve been learning a lot from your posts on double weave. Many thanks! At the moment I’m trying to reproduce the sample in the first photo on this page, with the staggered blue blocks, and I’m intrigued by its back. Is it the mirror image of the front? I’ve reached the third exchange of layers and I’m a bit lost with the liftplan. In the meantime I’ve subscribed to your newsletter and I’m looking forward to your next posts.
Hi Anna. You’ve hit on an interesting point – the back of this sample is quite strange and unexpected given the pattern on the front. In the middle part, where the weft interchange takes place, the warp layer is all the rust colour that we see at the edges of the sample on the face of the cloth, but this is mixed with the two shades of blue/green weft that we are using to create the blocks. There’s no rust weft active at this point at all. It can be tricky to get these designs to do what you want them to do, but if you sketch it out before you start then it does help with keeping track of which liftplan you need at each stage. If you’d like some more help with this pattern then do drop me an email and we can chat about it.
Cally, you are so wonderfully clear! Thank you, and can’t wait for your online course!
Yay! Thanks, Paola, exciting times ahead!!