We have threaded our loom for double weave. Now it is time to look at some of the key liftplans that allow us to weave two layers of cloth at once. Note that throughout this series I am going to discuss the principles of weaving double using liftplans rather than tie-ups. In my next post I will consider tie-up and treadling options. I think a side-note is in order.
Whatever loom I am going to weave on, I find it useful to start with the liftplan. This puts my focus first and foremost on the question “What shafts do I need to raise in order to create this weave structure?” This question allows me to focus on what is happening in the weave itself rather than on the mechanics of the loom. Once I am clear in my own mind about the answer, I can turn to the practical question “How do I implement these shaft combinations at the loom?” The answer to the second question will vary, depending on the loom I am using.
Key to liftplans
As always, the liftplan denotes which shafts need to be lifted for each pick. However, when weaving double we have two different reasons for lifting shafts: one is to weave a particular layer, the other is to get a layer out of the way. Now the loom makes no distinction – a lifted shaft is a lifted shaft – but it is important for the weaver to know, because that is how you learn to work fluently with the structure. So in the liftplans below two different symbols are used:

A reminder of the threading
I am going to use the divided parallel threading introduced in my previous post:

The light pink squares indicate the warp ends for layer one, which is threaded on shafts 1 and 2. The teal squares indicate the warp ends for layer two, which is threaded on shafts 3 and 4.
Weaving layers

When you are weaving double cloth, you will normally be using two shuttles, one for each layer. You generally want to maintain a rhythm of weaving one pick in each layer alternately. There are exceptions, but the aim is to keep the two layers growing at the same rate.
The way this is done is to weave the top layer ‘as usual’. If I want to see layer one – in this case, my light layer – on the face of the cloth, then I will make plain weave by raising shaft 1 for one pick and shaft 2 for the other. However, to weave the bottom layer, I have an extra challenge. In order to get access to it, I need to move the top layer out of the way. As well as alternately raising shaft 3 and shaft 4 to make the plain weave, I must also lift both shafts 1 and 2 at the same time. This gives us the following liftplan:
Layer one on top

When working with liftplans for double cloth, I find it useful to use the warp colours to remind myself which layer is threaded on which shafts. Hence the pink squares indicate ‘things I am doing with layer one’ and the teal squares ‘things I am doing with layer two’. For this example, I have also assumed that we are using the same yarns in the weft as in the warp.
Reading from the bottom up, we have
- Pick one: lift shaft 1 to weave layer one with the pink weft
- Pick two: lift shafts 1 and 2 to raise all of layer one out of the way, and shaft 3 to weave layer two with the teal weft
- Pick three: lift shaft 2 to weave the return pick in layer one using the pink weft
- Pick four: lift shafts 1 and 2 again to raise all of layer one out of the way, and shaft 4 to weave the return pick in layer two with the teal weft
By the time we have finished, both shuttles are back where they started and we have woven two picks of each layer of cloth. The light pink layer is on top, and the teal layer is on the bottom.
Layer two on top
When we switch our layers around, bringing the one that was on the bottom up to the top, it is called ‘layer exchange’. Let’s do it.
One option is to weave this liftplan:

This liftplan is very similar to our first one. In fact the Ws are placed in exactly the same way. The difference is that we are no longer lifting shafts 1 and 2 out of the way on picks two and four; instead, we are lifting shafts 3 and 4 out of the way on picks one and three.
- Pick one: lift shaft 1 to weave layer one with the pink weft and shafts 3 and 4 to raise all of layer two out of the way
- Pick two: lift shaft 3 to weave layer two with the teal weft
- Pick three: lift shaft 2 to weave the return pick in layer one with the pink weft and shafts 3 and 4 to raise all of layer two out of the way
- Pick four: lift shaft 4 to weave the return pick in layer two with the teal weft
In our first sequence we wove the top layer first and then the bottom layer. Now I am suggesting weaving the bottom layer first. Why?
Maintaining shuttle order
In this scenario, as long as you weave the two layers alternately, it doesn’t matter enormously which layer comes first. But it is useful to be consistent. One way to do this is to say ‘always weave the top layer first’ (or the bottom layer, it is up to you). However, as you advance into more complex designs, particularly when you are using more shafts, it becomes much harder to say what the ‘top layer’ is.
A better way to achieve consistency is to focus on the shuttles and the weft yarns. Pick either the layer one weft or the layer two weft and say ‘this one goes first’ whichever layer happens to be on top. I have done that here with my layer one/light pink layer. Again, there are designs you may want to weave that don’t fit this rule, but it is a lot more robust than the first option and lends itself to great flexibiliy with structure and pattern. Once upon a time I happened to drop a shuttle on a concrete floor and give it a bit of a dent, so I generally assign it to weave layer one and use the ‘dented shuttle goes first’ rule!
Speed it up, slow it down
The sequences I have shared will give you two picks of each layer. You can obviously repeat each sequence as often as you like before switching in order to create stripes of different widths, as I have done in the samples shown below.
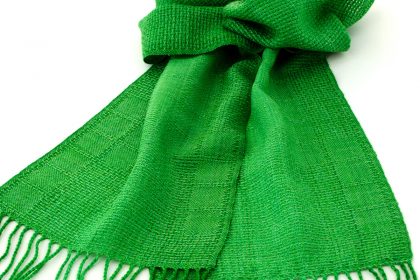
However, if you look closely, you will see that you can also mix and match the halves of each sequence. That is, you can weave with the first two picks of the sequence which places layer one on top, then switch weave the second two picks of the sequence which places layer two on top. This will give you very narrow stripes – a single pick of one layer on each surface of the cloth – and a lot of exchanges, which tends to make the cloth stiffer. It isn’t suitable for every application: a scarf might not drape very well, whereas a cushion cover would be fine.


But note that the picks must remain in pairs as the basic minimum. Just as a warp end in one layer is followed by a warp end in the other, so a pick in one layer must be followed by a pick in the other.
Managing two shuttles
I’ve already mentioned the importance of keeping track of your shuttles for the sake of consistency. Besides this, however, managing the two shuttles is actually an important aspect of creating the effect you want from your double weave.
You can choose to ‘interlock’ the two wefts at the selvedges to create a single piece of double density cloth, or you can leave the selvedges open to create tubes between two single layers. If you interlock at one selvedge and leave the other open, you can create woven pockets. This last option requires some mental agility to keep on track, but it is one of those things that is pleasing way beyond its practical applications: it is just so delightful that the weaving process enables us to do this.

The trick is this: know where to put the shuttle down. Oddly enough, it is not the weaving which determines whether or not the wefts interlock – it is where you place the shuttles when you are not weaving.
Placing the shuttles
It is easiest if you place each shuttle on the cloth in front of you after weaving. Then…

Coming up…
Next time I’ll share tie-ups and treadlings for layer exchange on a floor loom. Countermarche looms need special consideration when you are setting up for double weave, so we’ll think about how to manage this.
First posted on weavingspace.co.uk © Cally Booker